
Nih dia antivirus lokal heheh... mantap deh.. cepat dan stabil nih saya dapat ketika saya sedang berjalan-jalan di forum hehehe so langsung aja buktikan keampuhan antivirus ini
Nih buat link Downloadnya:>>>DOWNLOAD<<
Versi beta ini hanya untuk dicoba oleh anggota forum yang berpengalaman sehingga belum diizinkan untuk disebarkan ke umum karena masih banyak bug yang mungkin bisa berbahaya.
Penyempurnaan Rev. 8.2 :
- Penambahan database 80 virus baru
- Penambahan teknik heuristik untuk varian virus penginfeksi exe
- Penambahan database Virus Conficker lengkap untuk semua variannya
- Perbaikan Inter Process Communication SmaRTP-0
- Perbaikan false alarm pada Flashdisk U3
- Perubahan metode update
catatan : di komputerku sebelumnya sudah ada smadav 8.1 pro dan yang 8.2 beta ini juga langsung pro, jadi kemungkinan serial untuk 8.1 masih bekerja di versi 8.2 beta ini

Mediafire:
Part1 -> http://www.mediafire.com/?mo1ymzdizzm
Part2 -> http://www.mediafire.com/?yo4zqnjnzdz
Mirror Quickupload:
Part1 -> http://quickupload.net/92hfsdfakz6u/...part1.rar.html
Part2 -> http://quickupload.net/ne9ochcrr9w0/...part2.rr.html
definisinya nih:
Adobe Dreamweaver merupakan aplikasi super lengkap untuk kebutuhan pembuatan website dengan berbagai script yang didukungnya antara lain HTML, ActionScript, CSS, JavaScript, XML, ASP JavaScript, ASP VBScript, ASP .NET C#, ASP .NET VB, ColdFusion, JSP, PHP, dll. Adobe Dreamweaver versi terbaru ini juga disebut-sebut mendukung website content populer seperti Joomla! dan Drupal.
Yang akan saya bagikan buat sobat forum IDWS kali ini adalah Adobe Dreamweaver CS5 Full + Keygen. Aplikasi ini sebenarnya telah lama saya bagikan, namun terkendala oleh banyaknya link download yang corrupt dengan berbagai alasan yang saya tidak ketahui. Namun Adobe Dreamweaver CS5 yang saya bagikan ini, link download-nya tidak corrupt dan telah saya uji validitasnya.
Cara instal+patching:
Oh iya, untung saya belum lupa ^^. Untuk kelancaran cracking (bukan berarti saya mendukung piracy, walau semua konten blog ini adalah full version ^^) Adobe Dreamweaver CS5, berikut ini merupakan langkah-langkah cracking-nya (ada juga dalam paket download) :
* Instal Adobe Dreamweaver CS5 sebagai trial hingga selesai.
* Jangan jalankan Adobe Dreamweaver CS5 terlebih dahulu.
* Patching ‘disable phone home’ Adobe Dreamweaver CS5 dengan salah satu dari 2 metode dibawah ini :
1. Masukkan teks "127.0.0.1 activate.adobe.com", pada “Windows\system32\drivers\etc\hosts”.
2. Atau jalankan keygen dan pilih Patch. (ini mungkin lebih praktis)
* Sekarang jalankan Adobe Dreamweaver CS5.
* Masukkan serial yang didapat melalui keygen.
* Yupz... sekarang Adobe Dreamweaver CS5 sobat telah full version

DOWNLOAD
Password: boljugvisio
Apa sih itu microsoft visio?? bingung kan heheh saya juga sama.. setelah saya cari dan saya udek2 tuh mbah google akhirnya saya menemukan definisi microsoft visio nih dia definisinya:
Microsoft Visio merupakan salah satu keluarga dari Microsoft office yang memiliki kegunaan atau fungsinya sendiri. Berdasarkan akar katanya, visio berasal dari kata vision. Yang artinya penglihatan, daya lihat, dan pandangan. Jadi disimpulakan dari akar katanya, Microsoft visio berfungsi untuk melihat atau membuat suatu objek dari sudut pandang yang lain. Objek yang dimaksud di sini adalah sketsa.
Salah satu contoh sketsa yang dapat dibuat menggunakan Ms Visio adalah sketsa sebuah ruangan,seperti yang tampak pada gambar dibawah ini. Dengan menggunakan Ms Visio, perencangan sederhana seperti dibawah ini dapat dibuat dengan mudah.
Kali ini saya akan memberi anda software IDM 5.19

DOWNLOAD
ini dia feature baru idm 5.19 yang bisa kamu dapatkan.. mav b.inggris hehehe
Main Features:
• All popular browsers and applications are supported! Internet Download Manager has been tested with the following browsers: Internet Explorer, MSN Explorer, AOL, Netscape Communicator, Netscape 6, Netscape 7, Mozilla, Mozilla Firefox, Mozilla Firebird, Opera, NetCaptor, UltraBrowser, Slim Browser, Avant Browser, MyIE2, Optimal Desktop, Ace Explorer, Advanced Browser, 27 Tools-in-1 Wichio Browser, WindowSurfer, 550 Access Browser, FineBrowser Freeware, Kopassa Browser, Fast Browser Pro, Enigma Browser, GoSuRF, K-Meleon, Smart Explorer, The Off By One Web Browser, Smartalec Voyager, CrystalPort AppCapture, The Family Browser, XANA Web Browser, Bluto, AutoSurf, 32bit Web Browser, BrowseMan, WrestlingBrowser, Eminem Browser, UltraBrowser, Cygsoft LDAP Browser, and Net M@nager. Internet Download Manager supports all versions of popular browsers, and can be integrated into any 3rd party Internet applications.
• Easy downloading with one click. When you click on a download link in a browser, IDM will take over the download and accelerate it. IDM supports HTTP, FTP, HTTPS and MMS protocols.
• Download Speed Acceleration. Internet Download Manager can accelerate downloads by up to 5 times due to its intelligent dynamic file segmentation technology. Unlike other download managers and accelerators Internet Download Manager segments downloaded files dynamically during download process and reuses available connections without additional connect and login stages to achieve best acceleration performance.
• Download Resume. Internet Download Manager will resume unfinished download from the place where they left off.
• Youtube grabber. Internet Download Manager can grab FLV videos from popular sites like YouTube, MySpaceTV, and Google Video.
• Simple installation wizard. Quick and easy installation program will make necessary settings for you, and check your connection at the end to ensure trouble free installation of Internet Download Manager
• Drag and Drop. You may simply drag and drop links to IDM, and drag and drop downloaded files out of Internet Download Manager.
• Automatic Antivirus checking. Antivirus checking makes your downloads free from viruses and trojans.
• Advanced Browser Integration. When enabled, the feature can be used to catch any download from any application. None of download managers have this feature.
• Built-in Scheduler. Internet Download Manager can connect to the Inter
net at a set time, download the files you want, disconnect, or shut down your computer when it's done.
• IDM includes web site spider and grabber. IDM downloads all required files that are specified with filters from web sites, for example all pictures from a web site, or subsets of web sites, or complete web sites for offline browsing. It's possible to schedule multiple grabber projects to run them once at a specified time, stop them at a specified time, or run periodically to synchronize changes.
• IDM supports many types of proxy servers. For example, IDM works with Microsoft ISA, and FTP proxy servers.
• IDM supports main authentication protocols: Basic, Negotiate, NTLM, and Keberos. Thus IDM can access many Internet and proxy servers using login name and password.
• Download All feature. IDM can add all downloads linked to the current page. It's easy to download multiple files with this feature.
• Customizable Interface. You may choose the order, and what buttons and columns appear on the main IDM window.
• Download Categories. Internet Download Manager can be used to organize downloads automatically using defined download categories.
• Quick Update Feature. Quick update may check for new versions of IDM and update IDM once per week.
• Download limits. Progressive downloading with quotas feature. The feature is useful for connections that use some kind of fair access policy (or FAP) like Direcway, Direct PC, Hughes, etc.
• IDM is multilingual. IDM is translated to Albanian, Arabic, Azerbaijan, Bosnian, Bulgarian, Chinese, Croatian, Czech, Danish, Dutch, Farsi, French, German, Greek, Hebrew, Hungarian, Italian, Japanese, Korean, Lithuanian, Macedonian, Norwegian, Polish, Portuguese, Romanian, Russian, Serbian, Slovak, Slovenian, Spanish, Thai, Turkish, and Uzbek languages.
READ MORE

DOWNLOAD
ini dia feature baru idm 5.19 yang bisa kamu dapatkan.. mav b.inggris hehehe
Main Features:
• All popular browsers and applications are supported! Internet Download Manager has been tested with the following browsers: Internet Explorer, MSN Explorer, AOL, Netscape Communicator, Netscape 6, Netscape 7, Mozilla, Mozilla Firefox, Mozilla Firebird, Opera, NetCaptor, UltraBrowser, Slim Browser, Avant Browser, MyIE2, Optimal Desktop, Ace Explorer, Advanced Browser, 27 Tools-in-1 Wichio Browser, WindowSurfer, 550 Access Browser, FineBrowser Freeware, Kopassa Browser, Fast Browser Pro, Enigma Browser, GoSuRF, K-Meleon, Smart Explorer, The Off By One Web Browser, Smartalec Voyager, CrystalPort AppCapture, The Family Browser, XANA Web Browser, Bluto, AutoSurf, 32bit Web Browser, BrowseMan, WrestlingBrowser, Eminem Browser, UltraBrowser, Cygsoft LDAP Browser, and Net M@nager. Internet Download Manager supports all versions of popular browsers, and can be integrated into any 3rd party Internet applications.
• Easy downloading with one click. When you click on a download link in a browser, IDM will take over the download and accelerate it. IDM supports HTTP, FTP, HTTPS and MMS protocols.
• Download Speed Acceleration. Internet Download Manager can accelerate downloads by up to 5 times due to its intelligent dynamic file segmentation technology. Unlike other download managers and accelerators Internet Download Manager segments downloaded files dynamically during download process and reuses available connections without additional connect and login stages to achieve best acceleration performance.
• Download Resume. Internet Download Manager will resume unfinished download from the place where they left off.
• Youtube grabber. Internet Download Manager can grab FLV videos from popular sites like YouTube, MySpaceTV, and Google Video.
• Simple installation wizard. Quick and easy installation program will make necessary settings for you, and check your connection at the end to ensure trouble free installation of Internet Download Manager
• Drag and Drop. You may simply drag and drop links to IDM, and drag and drop downloaded files out of Internet Download Manager.
• Automatic Antivirus checking. Antivirus checking makes your downloads free from viruses and trojans.
• Advanced Browser Integration. When enabled, the feature can be used to catch any download from any application. None of download managers have this feature.
• Built-in Scheduler. Internet Download Manager can connect to the Inter
net at a set time, download the files you want, disconnect, or shut down your computer when it's done.
• IDM includes web site spider and grabber. IDM downloads all required files that are specified with filters from web sites, for example all pictures from a web site, or subsets of web sites, or complete web sites for offline browsing. It's possible to schedule multiple grabber projects to run them once at a specified time, stop them at a specified time, or run periodically to synchronize changes.
• IDM supports many types of proxy servers. For example, IDM works with Microsoft ISA, and FTP proxy servers.
• IDM supports main authentication protocols: Basic, Negotiate, NTLM, and Keberos. Thus IDM can access many Internet and proxy servers using login name and password.
• Download All feature. IDM can add all downloads linked to the current page. It's easy to download multiple files with this feature.
• Customizable Interface. You may choose the order, and what buttons and columns appear on the main IDM window.
• Download Categories. Internet Download Manager can be used to organize downloads automatically using defined download categories.
• Quick Update Feature. Quick update may check for new versions of IDM and update IDM once per week.
• Download limits. Progressive downloading with quotas feature. The feature is useful for connections that use some kind of fair access policy (or FAP) like Direcway, Direct PC, Hughes, etc.
• IDM is multilingual. IDM is translated to Albanian, Arabic, Azerbaijan, Bosnian, Bulgarian, Chinese, Croatian, Czech, Danish, Dutch, Farsi, French, German, Greek, Hebrew, Hungarian, Italian, Japanese, Korean, Lithuanian, Macedonian, Norwegian, Polish, Portuguese, Romanian, Russian, Serbian, Slovak, Slovenian, Spanish, Thai, Turkish, and Uzbek languages.
Alat-alat yang di butuhkan:
- Tang kerimping
- 2 buah RG 45
- Kabel UTP 5e dengan panjang secukupnya, sesuai dengan selera anda
- 2 buah PC yang akan dikoneksikan.
- 2 buah RG 45
- Kabel UTP 5e dengan panjang secukupnya, sesuai dengan selera anda
- 2 buah PC yang akan dikoneksikan.
Kali ini saya akan menjelaskan cara membuat dua buah kabel cross seperti gambar di bawah ini

Pertama lepaskan shield kabel ( pelindung kabel biasanya bewarna abu -abu ) beberapa centimeter ( 2 cm), dengan memotong shield tersebut menggunakan tang kerimping, kemudian lurus-luruskan kabel-kabel yang berwarna-warni tersebut, kemudian urutkan kabel berdasarkan pewarnaannya di salah satu ujung kabel UTP tersebut. Urutannya adalah sebagai berikut :


Di windows untuk melakukan koneksi 2 PC sama halnya dengan mengkoneksikan PC dengan topologi jaringan yang sering ditemui, biasanya topologi jaringan itu adalah star di mana di pertengahannya biasa ditemui menggunakan hub ataupun switch. Hal yang harus dilakukan untuk mengkoneksikan kedua PC di windows adalah sebagai berikut :
PC Pertama
Masukkan ke network connection di control panel :
Start menu | run | control panel
Masukkan ke network connection di control panel :
Start menu | run | control panel
Setelah itu masuk ke bagian Network Connections
Kemudian pilih Local Area Network Connection
Kemudian pilih Local Area Network Connection


Setelah itu klik button OK, kemudian Close
Nah untuk PC yang kedua tahapnya sama saja dengan yang diatas namun Alamat IP Addressnya berbeda dengan PC yang sebelumnya, anda dapat mengisinya dengan 192.168.1.1 atau dengan IP 192.168.1.x yang lain, terserah anda. Dengan catatan netmasknya harus sama dengan pc yang sebelumnya yakni 255.255.255.0
Kemudian langkah selanjutnya adalah melakukan konfigurasi network setup wizard untuk kedua PC tersebut, agar keduanya dapat saling terhubung sebagai satu workgroup.
Setelah selesai, lakukan ping dari salah satu PC tersebut ke PC lainnya... Jika tampilannya seperti ini maka PC anda telah terhubung satu sama lainnya.
C:Documents and SettingsAl-k>ping 192.168.1.1
Pinging 192.168.1.1 with 32 bytes of data:
Reply from 192.168.1.1: bytes=32 time<1ms TTL=128
Reply from 192.168.1.1: bytes=32 time<1ms TTL=128
Reply from 192.168.1.1: bytes=32 time<1ms TTL=128
Reply from 192.168.1.1: bytes=32 time<1ms TTL=128
Reply from 192.168.1.1: bytes=32 time<1ms TTL=128
Reply from 192.168.1.1: bytes=32 time<1ms TTL=128
Reply from 192.168.1.1: bytes=32 time<1ms TTL=128
Ping statistics for 192.168.1.1:
Packets: Sent = 4, Received = 4, Lost = 0 (0% loss),
Approximate round trip times in milli-seconds:
Minimum = 0ms, Maximum = 0ms, Average = 0ms
Packets: Sent = 4, Received = 4, Lost = 0 (0% loss),
Approximate round trip times in milli-seconds:
Minimum = 0ms, Maximum = 0ms, Average = 0ms
Selamat ...
linux, netwotk, tutorial linux, tutorial jaringan, free download
Thnks to: http://www.ilmuwebsite.com

tapi bisa kok buat modem yang lain ikuti perintah2 di bawah ini:
root@home:~# wvdialconf
Editing `/etc/wvdial.conf'.
Scanning your serial ports for a modem.
Modem Port Scan<*1>: S0 S1 S2 S3
WvModem<*1>: Cannot get information for serial port.
ttyUSB0<*1>: ATQ0 V1 E1 -- OK
ttyUSB0<*1>: ATQ0 V1 E1 Z -- OK
ttyUSB0<*1>: ATQ0 V1 E1 S0=0 -- OK
ttyUSB0<*1>: ATQ0 V1 E1 S0=0 &C1 -- OK
ttyUSB0<*1>: ATQ0 V1 E1 S0=0 &C1 &D2 -- OK
ttyUSB0<*1>: ATQ0 V1 E1 S0=0 &C1 &D2 +FCLASS=0 -- OK
ttyUSB0<*1>: Modem Identifier: ATI -- Manufacturer: huawei
ttyUSB0<*1>: Speed 9600: AT -- OK
ttyUSB0<*1>: Max speed is 9600; that should be safe.
ttyUSB0<*1>: ATQ0 V1 E1 S0=0 &C1 &D2 +FCLASS=0 -- OK
WvModem<*1>: Cannot get information for serial port.
ttyUSB1<*1>: ATQ0 V1 E1 -- OK
ttyUSB1<*1>: ATQ0 V1 E1 Z -- OK
ttyUSB1<*1>: ATQ0 V1 E1 S0=0 -- OK
ttyUSB1<*1>: ATQ0 V1 E1 S0=0 &C1 -- OK
ttyUSB1<*1>: ATQ0 V1 E1 S0=0 &C1 &D2 -- OK
ttyUSB1<*1>: ATQ0 V1 E1 S0=0 &C1 &D2 +FCLASS=0 -- OK
ttyUSB1<*1>: Modem Identifier: ATI -- Manufacturer: huawei
ttyUSB1<*1>: Speed 9600: AT -- OK
ttyUSB1<*1>: Max speed is 9600; that should be safe.
ttyUSB1<*1>: ATQ0 V1 E1 S0=0 &C1 &D2 +FCLASS=0 -- OK
Found a modem on /dev/ttyUSB0.
Modem configuration written to /etc/wvdial.conf.
ttyUSB0
ttyUSB1
root@home:~#
2-Then I tried :
root@home:~# wvdialconf test
..
root@home:~# cat test
[Dialer Defaults]
Init2 = ATQ0 V1 E1 S0=0 &C1 &D2 +FCLASS=0
Modem Type = Analog Modem
; Phone =
ISDN = 0
; Username =
Init1 = ATZ
; Password =
Modem = /dev/ttyUSB0
Baud = 9600
3-Kemudian masuk kedalam folder yang menyimpan wvdial.conf lalu edit deh sama kalian seperti setingan di bawah ini kalo ga salah wvdial.conf ada di dalam sini(in /etc/wvdial.conf):
[Dialer Defaults]
Init1 = ATZ
Init2 = ATQ0 V1 E1 S0=0 &C1 &D2 +FCLASS=0
Modem Type = Analog Modem
Baud = 9600
New PPPD = yes
Modem = /dev/ttyUSB0
ISDN = 0
; Phone =
; Password =
; Username =
into
[Dialer Defaults]
Init1 = ATZ
Init2 = ATQ0 V1 E1 S0=0 &C1 &D2 +FCLASS=0
Modem Type = Analog Modem
Baud = 9600
New PPPD = yes
Modem = /dev/ttyUSB0
ISDN = 0
Phone = *99#
Password = user
Username = pass
Stupid Mode = 1
Where X in "Phone=X" is your ISP phone number specific.. In my case it`s *99#
..not sure why I have to put "Stupid Mode = 1" but it works. So I did this:
root@home:~# kate /etc/wvdial.conf
then copy and paste the code config above to wvdial.conf
4-Now to connect type "wvdial":
root@home:~# ldconfig
root@home:~# wvdial
--> WvDial: Internet dialer version 1.60
--> Cannot get information for serial port.
--> Initializing modem.
--> Sending: ATZ
ATZ
OK
--> Sending: ATQ0 V1 E1 S0=0 &C1 &D2 +FCLASS=0
ATQ0 V1 E1 S0=0 &C1 &D2 +FCLASS=0
OK
--> Modem initialized.
--> Sending: ATDT*99#
--> Waiting for carrier.
ATDT*99#
CONNECT
--> Carrier detected. Starting PPP immediately.
--> Starting pppd at Mon Jun 22 14:01:21 2009
--> Pid of pppd: 6150
--> Using interface ppp0
--> pppd: ���[08][10]��[08]
--> pppd: ���[08][10]��[08]
--> pppd: ���[08][10]��[08]
--> pppd: ���[08][10]��[08]
--> pppd: ���[08][10]��[08]
--> pppd: ���[08][10]��[08]
--> local IP address x.x.x.x
--> pppd: ���[08][10]��[08]
--> remote IP address y.y.y.y
--> pppd: ���[08][10]��[08]
--> primary DNS address a.a.a.a
--> pppd: ���[08][10]��[08]
--> secondary DNS address b.b.b.b
--> pppd: ���[08][10]��[08]
Here the important data are:
local IP addrss is our IP
remote IP is the gateway <--gw
primary DNS addrss is the DNS server IP<--nameserver
but still not connected:
root@home:~# ping w w w google c o m
ping: unknown host w w w google c o m
So lets assigne our IP manually with the above info:
ifconfig ppp0 x.x.x.x
route add default gw y.y.y.y
echo nameserver a.a.a.a > /etc/resolv.conf
Now:
root@home:/home/refan# ping w w w google c o m
PING w w w google c o m (64.233.189.99) 56(84) bytes of data.
64 bytes from hk-in-f99.google.com (64.233.189.99): icmp_seq=1 ttl=243 time=135 ms
64 bytes from hk-in-f99.google.com (64.233.189.99): icmp_seq=2 ttl=243 time=124 ms
64 bytes from hk-in-f99.google.com (64.233.189.99): icmp_seq=3 ttl=243 time=132 ms
64 bytes from hk-in-f99.google.com (64.233.189.99): icmp_seq=4 ttl=243 time=131 ms
^C
--- w w w google c o m ping statistics ---
4 packets transmitted, 4 received, 0% packet loss, time 3003ms
rtt min/avg/max/mdev = 124.031/131.213/135.879/4.410 ms
root@home:/home/refan#
For backtrack 3 user,install wvdial and wvstreams, type:
installpkg wvstreams-3.75.0-i486-1nec.tgz
installpkg wvdial-1.54.0-i486-1nec.tgz
for backtrack 4 beta user, just type "apt-get install wvdial"
and it works for me, hopefully it can be useful.
I believe there is a better method and I am still searching...
Thanks for the devs for this release, I have learned many new things here and keep up the good works.
linux, netwotk, tutorial linux, tutorial jaringan, free download
Tutorial ini saya dapat dari
http://forums.remote-exploit.org
Yang di butuhkan:


linux, netwotk, tutorial linux, tutorial jaringan, free download
Thanks to: http://amin888.e-mandiri.com and http://news.softpedia.com/news/Installing-Ubuntu-10-04-LTS-141550.shtml
READ MORE
1. Dvd kosong
2. Iso linux ubuntu 10.4 atau yang lebih tinggi kamu bisa download di: http://www.ubuntu.com/desktop/get-ubuntu/download
3. Komputer
Step-by-step:
- Burn iso linux ubuntu ke dvd kosong
- Restart komputer dan rubah first boot ke dvd-room
- Tunggu sampai muncul tampilan seperti ini

- Kemudian pilih bahasa dan klik tombol Install Ubuntu 10.04 LTS

- Kemudian akan tampil peta dunia. Arahkan mouse ke salah satu kota misalnya Jakarta untuk menentukan timezone atau bisa pilih list Region dan Time Zone… klik tombol Forward untuk lanjut

- Kemudian tentukan keyboard layout… untuk kita di Indonesia pilih saja Suggested option : USA…. klik tombol Forward untuk lanjut

- Berikutnya partisi harddisk… yang ini harus hati-hati. Ada 4 opsi yaitu :
2. Jika Anda akan menghapus OS yang lain itu atau harddisk sudah kosong dan Anda ingin installer otomatis lakukan partisi, silahkan pilih opsi kedua : “Use the entire disk.”

3. Opsi ketiga yaitu “Use the largest continuous free space”… maka installer akan install Ubuntu 10.4 ke partisi kosong di komputer Anda.
4. Opsi keempat yaitu “Specify partitions manually”… ini hanya direkomendasi untuk advanced users yaitu bisa buat partisi khusus atau format partisi dgn jenis filesystem yang berbeda dan bisa juga create partisi /home dan bisa tetap ada kalau misalnya mau install ulang nantinya.
Berikut penjelasan detil cara partisi manual dengan /home :
- Pilih tombol “Specify partitions manually (advanced) and click the “Forward”;
- Pastikan harddisk yg dipilih benar. /dev/sda is the harddisk fisik pertama. /dev/sdb adalah harddisk fisik kedua di komputer Anda. Jadi, pastikan mana yang Anda ingin format kalau salah maka data di harddisk tsb akan HILANG SEMUA;
- Jika andaikan saja harddisk terpilih itu kosong (tidak ada OS atau data penting), tapi masih ada partisi di dalamnya. Pilih satu partisi lalu klik tombol “Delete”… hingga akhirnya muncul kata “free space”. Lakukan hal yg sama utk partisi-partisi yang lain sampai hanya muncul 1 baris kata “free space”;
- Pilih baris “free space” tadi, klik tombol Add dan di window yang muncul ketik 2000 di “New partition size in megabytes” dan pilih opsi “swap area” dari list “Use as:”. Klik tombol OK stlh beberapa detik muncul baris “swap” sesuai dgn size 2000 tadi. Ini cuma contoh, biasanya size swap sama dgn memory fisik Anda;
- Pilih lagi baris “free space”, klik tombol Add dan pilih opsi Primary lalu ketik antara 10.000 dan 50.000 di kotak “New partition size in megabytes” dan pilih / sebagai “Mount point.” Klik tombol OK stlh beberapa detik akan muncul baris “ext4 /”;
- Pilih lagi baris “free space”, klik tombol Add dan pilih opsi Primary lalu ketik antara 30.000 dan 50.000 (space yang masih tersisa) di kotak “New partition size in megabytes” dan pilih /home sebagai “Mount point.” Klik tombol OK stlh beberapa detik akan muncul baris “ext4 /home”;

- Ini seharusnya tampilan tabel partisi Anda… jika iya silahkan klik tombol Forward untuk lanjut

- PERINGATAN : data yang ada akan HILANG dan TDK BISA DIKEMBALIKAN
- klik tombol Forward untuk lanjut….
- Di screen Who are you? silahkan isi selengkapnya… nama komputer itu otomatis tapi bisa diganti… klik Forward untuk lanjut

- Akhirnya sampai di step terakhir. Di sini, Anda bisa install boo loader di partisi atau di harddisk (pilihan default).
Klik tombol Install untuk lanjut…

- OS Ubuntu 10.04 LTS (Lucid Lynx) akan terinstall…..

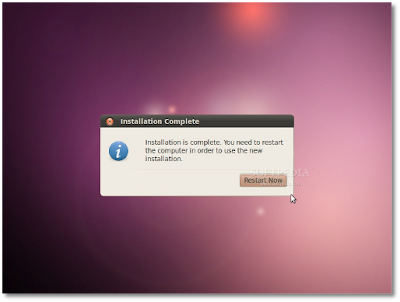
- Setelah kira-kira 10-18 menit (tergantung spek komputer Anda), popup window akan muncul memberitahukan instalasi telah selesai. Klik tombol “Restart Now” untuk lanjut

- CD akan tereject… keluarkan CD lalu tekan keyboard “Enter” untuk reboot. Komputer akan restart dan dalam beberapa detik Anda akan melihat Ubuntu boot splash….

- Di layar login, ketik username Anda lalu ketik passwordnya. Klik tombol “Log In” atau tekan “Enter”

- Enjoy… dan nikmatilah rasa terbaru dari Ubuntu 10.04 LTS !

linux, netwotk, tutorial linux, tutorial jaringan, free download
Thanks to: http://amin888.e-mandiri.com and http://news.softpedia.com/news/Installing-Ubuntu-10-04-LTS-141550.shtml


